Starting My Faerie

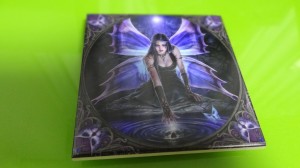
A white faerie in black clothes with clear dark blue wings and long black hair reaches for a skull in a rippling pond.

Immortal Flight by Anne Stokes

Wow, it has been so long since I added anything here.  In my defense, I moved in May and, um, procrastinated the rest of the time.  I’m finally settled for the summer (I go to college in the fall so I’ll move at least once this year and I’ll travel some more this summer).  Last weekend I went to the Bead and Button Show in Milwaukee, Wisconsin and decided it was time to start a project I had put off, a faerie based off an art tile I had picked up by Anne Stokes.

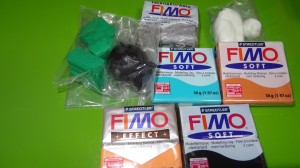
I plan to reproduce much of this image in polymer clay with a wire armature.   Below are some of the colors I will use to make the sculpture.

A few different colors of FIMO polymer clay, most of them still in their wrapping

Since that picture I have picked up a few skin tone squares to make her very pale skin and I’m still deciding how I will do her eyes, which are half closed in the tile.  In case you’re wondering why I am writing “faerie” instead of “fairy”, it is intentional.  When I think of “fairy” I think of the cutsy, small Tinkerbell version of fairies that children are taught of but “faeries” are the newer, more adult version of nearly human creatures, often with some sort of wing, that are not so bright, pure, and innocent.  Faeries have lived a long time and seen Mother Nature angry, sad, and happy.  They live beside dragons, elves, dwarfs, trolls, witches, werewolves, and ancient gods like Hera and demigods like Perseus.  These creatures protect the planet and forests, helping grow crops and sometimes helping Mother Nature in her devastation.   Faeries are not light and innocent, but many shades of gray and darker colors, in this case dark blues and purples.  I want to be able to sculpt these creatures, and all that inhabit the world of myth, in a way to show the beauty of that world.  However, I’m not that good at drawing or seeing the creatures in my head yet so I will use this tile as my guide to practice on and see what all will go into one figure and the scene around it.  If needed I have two other art tiles of Anne Stokes to recreate.

First things first though.  Now I have all the clay I think I’ll need, my oven nearby for when I finish, and a few decorations for the final scene.  Time to start the creating process.  Looking at the faerie, I assume she is sitting on her feet under her dress as she reaches for the skull.  That tells me that her legs and feet will be under skirt and aren’t as important as the rest of the skin will be.  With that in mind, I make the wire frame for the armature:A few pieces of wire bent to resemble a line drawing of a person sitting on their feet
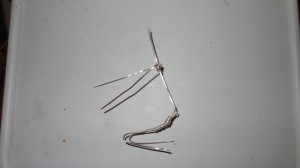
I realize it doesn’t look like a lot at this point.  I’ve been told the legs should be longer and the wire for the neck is probably too long but the head wire can be cut and extra clay can be added to make the legs longer.  At least it looks like a human.  My next step is to add wings and aluminum foil to complete the armature so I can put clay on it.  (Don’t worry, I’ll explain the armature next time when I complete mine.)

So for now: Have a nice day and enjoy crafting!
 

Bingata

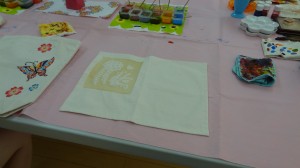
A cloth placemat with the rice-paste to allow for ease of painting.   I’m currently visiting my sister in Okinawa, Japan and she took me to a class on how to make bingata.  I chose to make a bingata place mat so this is what awaited me:


I didn’t know what “bingata” was (that is link to a Wikipedia article that will explain it better than I will) but it is basically a special way to paint fabrics.  The technique came from India and possibly China before trade brought the knowledge to Okinawa during the Ryukyun Kingdom.  When the Japanese took over Okinawa, trade changed and they lost the access to the pigments they were used to and had to create new pigments from local items.  Those techniques were lost during the Battle of Okinawa during World War 2 so one of the remaining members of the three families allowed from ancient times to produce bingata went to mainland Japan to get the stencils taken by soldiers or collectors.  He revived the art with the new stencils and his son is still creating the art in his studio.

What is bingata? you ask.  Have you seen those kimonos from before the second World War that have decorations on them?  Not the plain ones but the pictures of the very wealthy or royalty wearing flowing kimonos with nature scenes on them?  Those scenes are hand painted using the bingata technique.  Yes, those huge silk kimonos were hand painted.

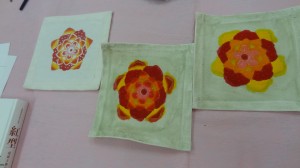
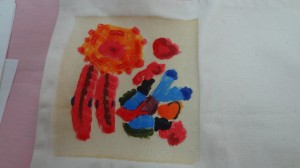
Three squares showing the progression of painting to shading to finished.The first step to creating a bingata masterpiece is to cut mulberry paper by hand into delicate shapes which then get pasted on a type of thin lace to hold everything in place.  After the stencil is complete, it is laid out over the cloth and a special paste of rice, rice bran, and water is put over the cloth and lace stencil. Then the stencil is lifted off the fabric, leaving the rice-paste where the stencil hadn’t been.  Next the pigment is applied and the artist doesn’t need to stay in the lines.  In fact, the idea is to paint beyond the lines so every little part is colored.   Once the paste is removed, all the paint not on the stenciled area will be removed as well.  After the first layer of pigment is done, the cloth is heated (in our case using a hair dryer) until dry and another set of pigment is applied.  This type of pigment is used for shading and it is more carefully applied.  (The first square on the right shows the first step, the purely painting part, the middle one shows after shading, and the one on the left is the finished product.)  After the shading is done, the cloth is heated again before the paste is washed off with the excess paint.  It may take a few tries, especially for newcomers, but the paste should come off leaving a delicate design of many shades on the cloth.

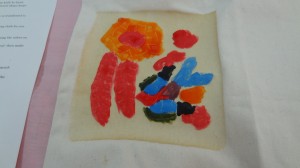
The teacher had already put down the stencil on the paste and removed the stencil by the time the class started (those steps can take a few days so that was good) and all we had to do was paint the image on the paper.  I decided to try and get an unrealistic bird and flower based on the idea of fire.

A flower and bird with hearts painted rather sloppilly not paying attention to the lines.

My bingata place mat before the shading.

A flower and bird painting with shading

My bingata after the shading

My sister and I will now have to wait a few days before we can iron our bingata pieces and wash off the paste to see what we created in our first time working with the paints.  We both eagerly await the “unveiling” of our creations.  Earlier in the class the teacher had mentioned a yellow shading pigment so I had planned on it in my design.  No such luck so I had to adapt with darker pigments.  We’ll see how it comes out.

Clay Dragon

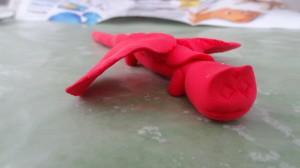
A small red clay dragon with diamond eyes, short stubby legs, and a long straight tail.

My first dragon

I recently got back to my clay and a polymer clay magazine which gave me a lot of ideas.  However, I don’t yet have an oven for polymer clay so while I wait, I get to practice with basic children’s clay which I picked up at our local toy store.  This is my first attempt at creating a dragon.  From tail to head is about long enough to fit on my hand from wrist to the tip of my middle finger.  I think I got the basics down for such a small dragon, although I admit I still have a long way to go before it looks like more than child’s play.  I enjoyed my first attempt at a dragon, figuring out how to manage the clay and how it will work to create the image I had in mind.  Step by step I’ll get comfortable with clay and learn how to get the image in my head onto the clay in my hand.  Once I’m comfortable with children’s clay, which is designed to stay moist and workable much longer than most modeling clays, I’ll start working on more permanent items or sculptures.  Eventually I want to work my way up to beads and sculptures in polymer clay that I bake.  However, that will take time and practice so I think I’ll just go back to my clay…

Origami Lilies

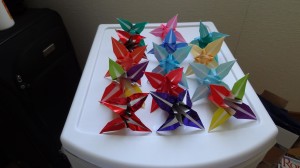
14 origami lilies of different colors and shades on a white table

My Easter Lilies

I finally finished those origami flowers I started Easter weekend.  Remember that post I wrote saying that I wanted to brighten up my house with flowers for spring and than only got a few done by Monday?  I partially folded precut origami paper into a number of origami lilies and then they sat in a box next to my bed for months.  This week I finally decided to finish them all and make a few more.  It’s interesting to me that once I got a few lilies done I started to feel comfortable with them and decided to make a few more than my original stash of partially finished flowers.  I would definitely not call myself an expert on the folding (many of my creations still come up uneven or oddly twisted like the red flower in front) but I would say I’m ready for my next origami figure.

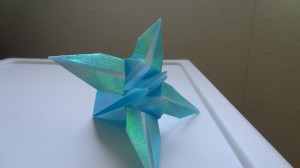
    I think that my favorite flower is the shimmery blue one.  It was made of stiffer paper so it was easier to fold.  I figured that thicker paper would be harder to fold but it kept its shape well whereas the usual thin paper had no problem refolding to adjust to newer folds which would screw up the final product.A single light blue sparkly origami lily on a white countertop