Putting Armature On My Faerie
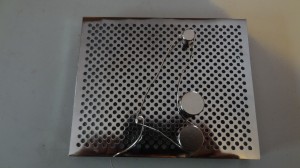
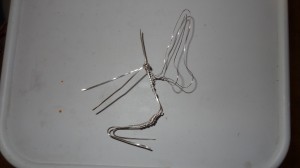
Last night I started with the wire frame of my faerie finished and my polymer clay for the skin conditioned. The next part of the project was to create the wings. I could have put the armature on before doing the wings but I planned to make the armature out of aluminum foil. Wrapping the wing wires around loose aluminum didn’t sound too easy so I created the wire frames for the wings before adding the aluminum foil. I created my wings on a Wig Jig out of 20 gauge wire. I wrapped the wire around the first peg a few times to hold it in place and get some extra wire on that side. I wrapped the end piece around the first peg once and left a long piece hanging before I cut the wire. The I took the wire off the jig and unraveled the starting piece as well as the ending piece, then put my pliers where the first peg would have been on each side and twisted the two ends together a few times. That way the two ends stayed together, there are long enough pieces to attach the wings to the skeleton, and the wings will stand out some from the skeleton so the wings will look like they are coming from her back, not her spine.
 The next step was to add the two wing parts to the skeleton. First I took the long ends on each piece and twisted them together twice. That way they would stay together if bent instead of leaving dents in the clay if the wings were attached straight to the spine and not each other. Finally I wrapped each wire to the body a little below the shoulders. It may look more majestic to have the huge wings coming from between the shoulder blades but I have a small oven so I thought it best to have the wings end not too much higher than the head. I attached two strands of the wire (one from each wing) to the spine above the wings and the other ends I twisted around the spine below the wings. Hopefully if the wings are evenly anchored, they won’t droop or bend up but stand straight like real wings might.
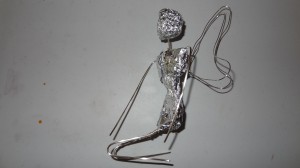
The last part of the project for today was adding the aluminum foil to create what I had called the armature. I did some research and found out that the armature in art is the skeleton. Things like wire or paper is used in professional art in order to stabilize the sculpture while being created and is often removed before curing since they would burn in a kiln. In polymer clay, the oven that pieces get cured in does not get hot enough to explode the metal wire or melt aluminum foil so the armature usually stays in when cured and after. Many polymer clay artists add aluminum foil to their skeletons to add stability and reduce the amount of clay used, which reduces the weight of the finished project.
I added the aluminum foil to my wire skeleton in layers, one piece wrapping around the top of the wing pieces and another wrapping underneath the wing pieces to create the waist and hips. I then rolled a ball of foil for the head and stuck it in place. The next step will be to cover the armature with flesh colored clay and create the face.
Tagged with: clay • clay art • clay faerie • faerie art • fun with clay
Filed under: Clay Sculpting
